Usage#
For using the HIP-VS extension, the corresponding compilers should be installed in the system by the following software products:
AMD HIP SDK 7.2andHIP_PATHenvironment should be set to its root folder for using HIP-VS extension forAMD GPUtargets*CUDA Toolkit 12.9.1 for Windows, and
CUDA_PATHenvironment should be set to its root folder for using HIP-VS extension forNVIDIA GPUtargets (CUDA Toolkit installer implicitly performs it by default)*
* Both AMD HIP SDK and CUDA Toolkit can be installed in the system and used by the HIP-VS extension in Visual Studio.
If the HIP_PATH environment variable is not set by the AMD HIP SDK, set the HIP_PATH environment variable manually to the root directory of the installed AMD HIP SDK. For instance:
setx HIP_PATH "C:\Program Files\AMD\ROCm\7.2"
If the HIP_PATH is not set, then HIP_DIR is used for AMD HIP SDK detection, then HIPInstallDir, and then the option HIPPath is used.
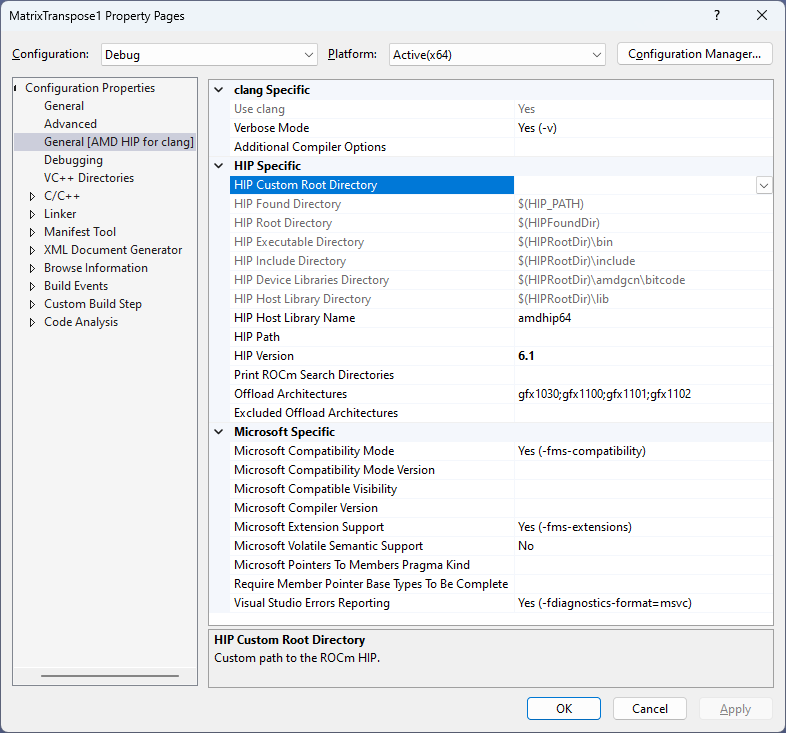
Custom path to the AMD HIP SDK might be specified locally for the AMD HIP Project in the HIP Custom Root Directory property:
If the CUDA_PATH environment variable is not set by the NVIDIA CUDA Toolkit, set the CUDA_PATH environment variable manually to the root directory of the installed NVIDIA CUDA Toolkit. For instance:
setx CUDA_PATH "c:\Program Files\NVIDIA GPU Computing Toolkit\CUDA\v12.9"
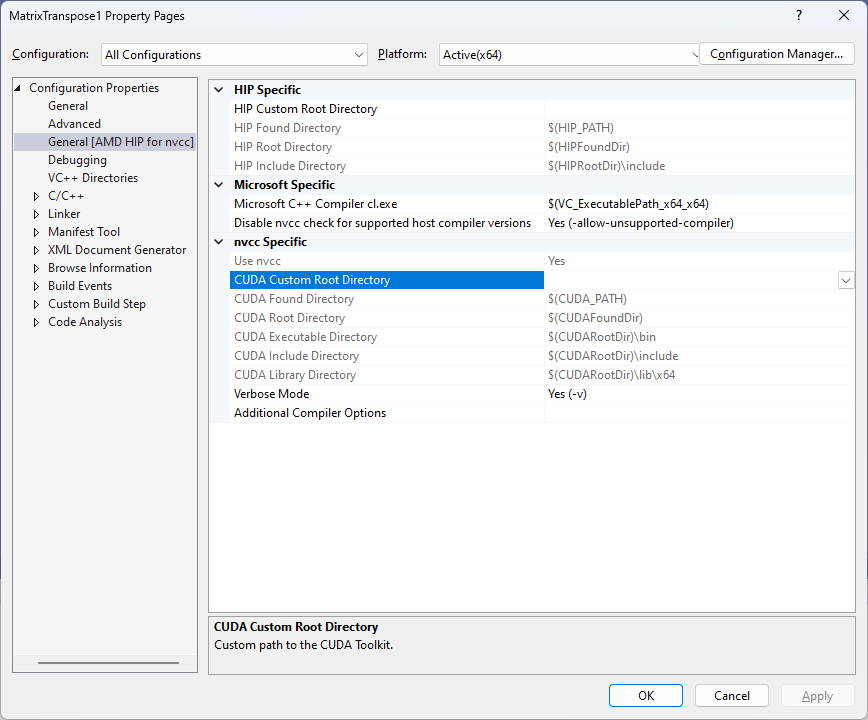
Custom path to the CUDA Toolkit might be specified locally for the AMD HIP Project in the CUDA Custom Root Directory property:
Run Visual Studio. Select Create a new project.
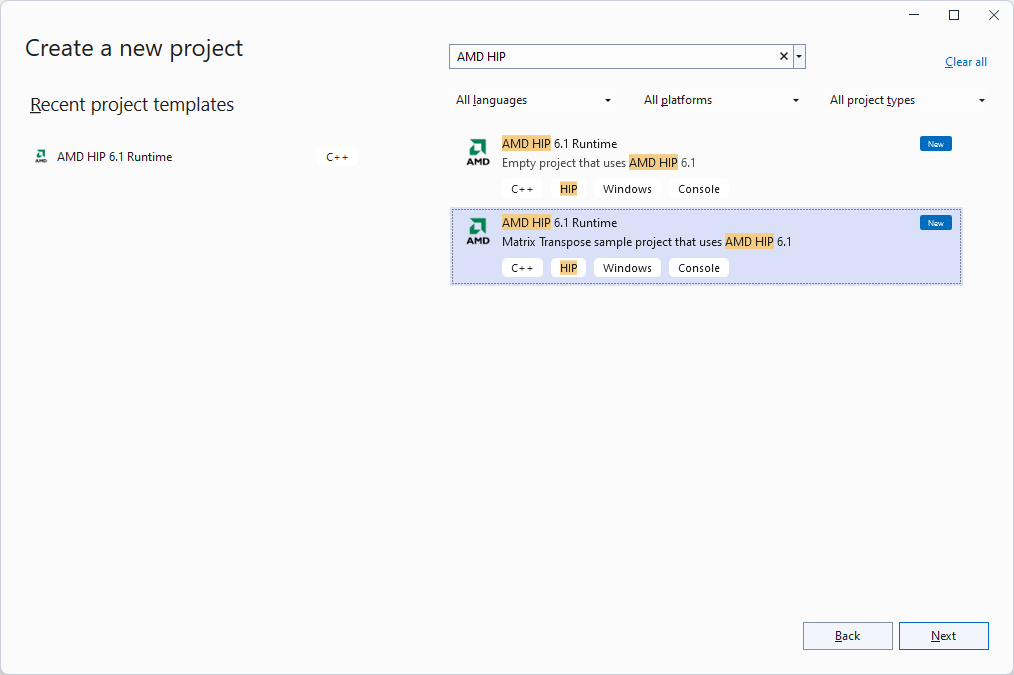
Select a HIP project template. The available AMD HIP project templates are Empty project and Matrix Transpose sample.
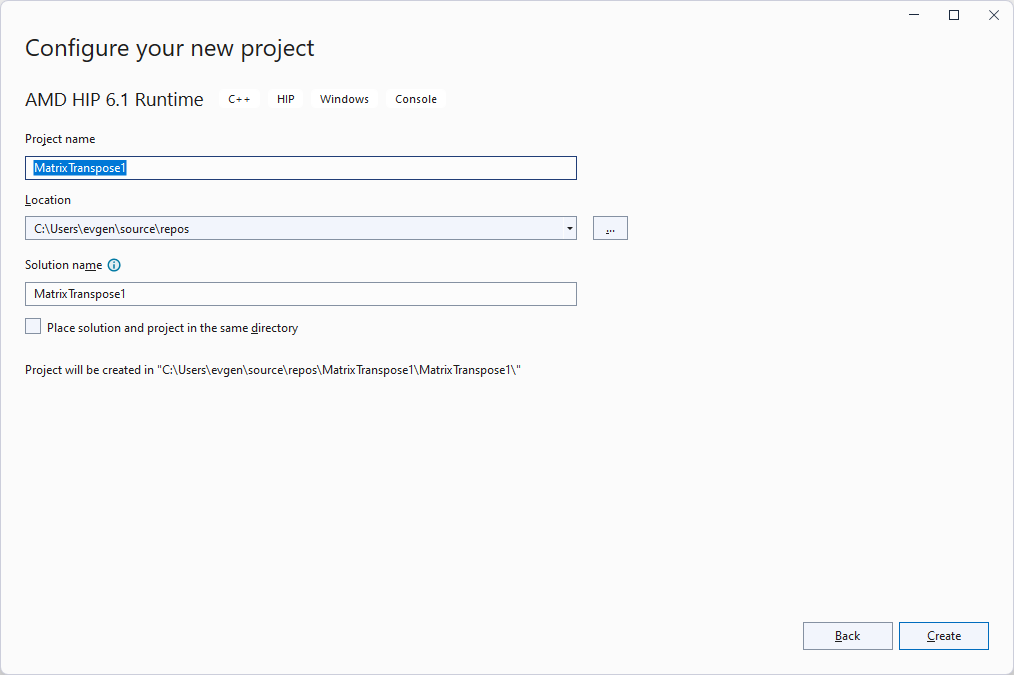
Configure your project following the project wizard instructions.
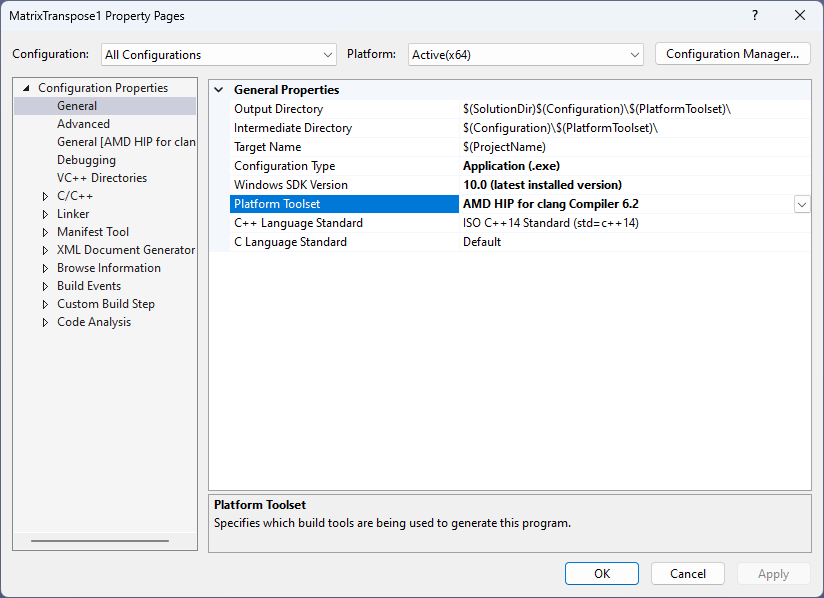
Open your project properties (Alt+Enter) and ensure that the AMD HIP for clang Compiler 7.2 Platform Toolset is set.
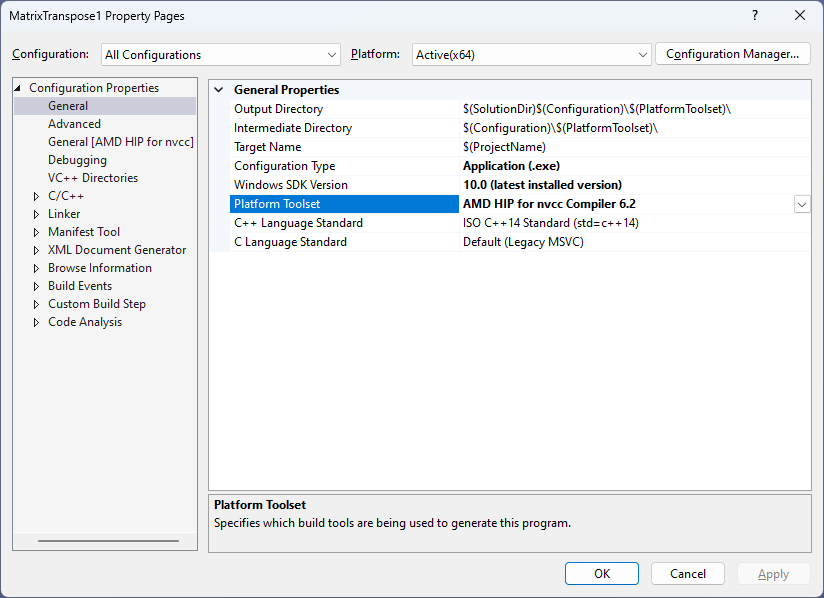
To build your HIP project by nvcc, select AMD HIP for nvcc Compiler 7.2 Platform Toolset.
Select Configuration (Release or Debug) and set the necessary C/C++, Linker/Lib, or AMD HIP specific option.
Currently, the only available Platform supported by AMD HIP is x64, so don’t try to create your own Platform: it won’t work.
Do all the necessary changes to your HIP Solution by adding new or existing source and header files, adding a new or existing HIP project to your solution, editing sources, etc.
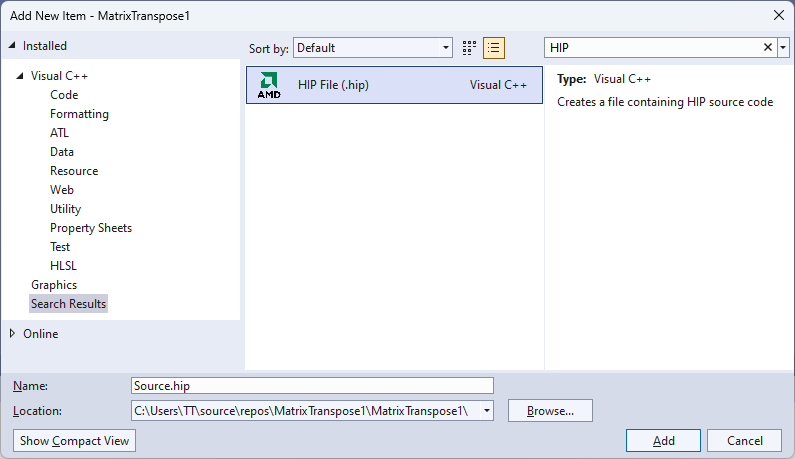
For instance, to add a new HIP source file, click the right mouse button on Source Files of the needed HIP project in the Solution Explorer view and select Add -> New Item..., and then select Visual C++ -> HIP File (.hip).
To add an existing HIP source file, click the right mouse button on the Source Files of the needed HIP project or on the HIP project itself in the Solution Explorer view and select Add -> Existing Item....
Then, select the existing HIP source file(s) and push the button Add. The selected HIP source files will be added to the chosen project.
The additionally supported file extensions are .hip, .cu, and .cuh - the last one is yet another C/C++ header file, which is placed in the Header Files section after adding it as an existing item. It is possible to use in HIP projects the files with all currently existing C/C++ extensions supported by Visual Studio.

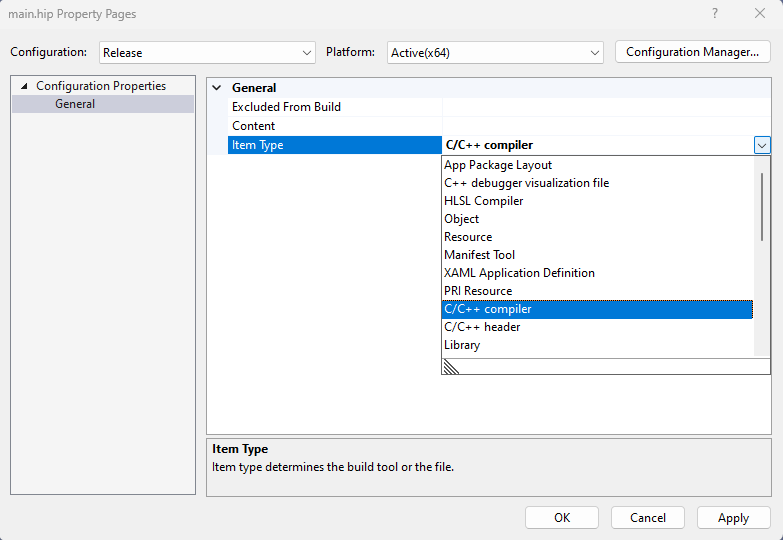
The type of every source file can be changed by clicking the right button on the file in the Solution Explorer view and selecting Properties (Alt+Enter).
The Item Type of the selected source file can be changed in the appeared Property Pages dialog; the changes will be applied to all existing configurations.
Files of only the C/C++ compiler and C/C++ header types take part in the compilation process.
It is also possible to exclude a particular file from the building process by selecting Does not participate in build as Item Type.
Build your HIP Solution (Ctrl+Shift+B).
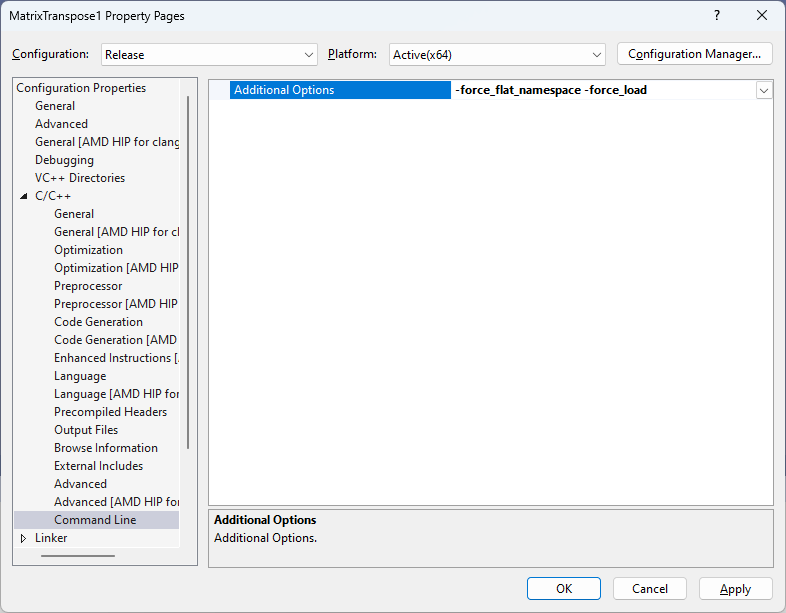
The compiler options can also be provided via the C/C++ -> Command Line -> Additional Options field. Multiple options separated by a space delimiter can be specified as well. If the compiler (clang or nvcc) doesn’t support the specified option(s), it throws a corresponding error or warning.
Here is an example of providing additional compiler options to the clang compiler:
In the same way, additional nvcc options can be provided through the Additional Options field.