ComfyUI on ROCm installation#
2026-04-28
5 min read time
This topic covers setup and installation instructions to help you get started running ComfyUI.
System requirements#
To use ComfyUI 0.18.2, you need the following prerequisites:
Operating system: Ubuntu 24.04, 22.04
GPU platform: AMD Instinct™ MI355X, MI325X, MI300X
PyTorch: 2.10.0a0+git449b176
Python: 3.12
Install ComfyUI#
To install ComfyUI on ROCm, you have the following options:
After setting up the container with either option, follow the common step to launch the ComfyUI server.
Use a prebuilt Docker image with ComfyUI pre-installed#
The prebuilt image contains a fully configured ComfyUI installation and all required dependencies pre-installed.
Pull the Docker image.
docker pull rocm/comfyui:comfyui-0.18.2.amd0_rocm7.2.0_ubuntu24.04
docker pull rocm/comfyui:comfyui-0.18.2.amd0_rocm7.1.0_ubuntu22.04
Start a Docker container using the image.
docker run -it --privileged \
--rm \
--device=/dev/kfd \
--device=/dev/dri \
--group-add video \
--cap-add=SYS_PTRACE \
--security-opt seccomp=unconfined \
--ipc=host \
-p 8188:8188 \
rocm/comfyui:comfyui-0.18.2.amd0_rocm7.2.0_ubuntu24.04
docker run -it --privileged \
--rm \
--device=/dev/kfd \
--device=/dev/dri \
--group-add video \
--cap-add=SYS_PTRACE \
--security-opt seccomp=unconfined \
--ipc=host \
-p 8188:8188 \
rocm/comfyui:comfyui-0.18.2.amd0_rocm7.1.0_ubuntu22.04
Build from source#
ComfyUI on ROCm can be run directly by setting up a Docker container from scratch. A Dockerfile is provided in the ROCm/ComfyUI repository to help you get started.
Clone the ROCm/ComfyUI repository.
git clone https://github.com/rocm/ComfyUI.git -b amd-integration
cd ComfyUI
Build the Docker image.
docker build --file docker/Dockerfile.rocm --tag comfyui-rocm .
This will pull the
rocm/pytorch-training:v25.2image and install ComfyUI, the ComfyUI Node Manager, the rgthree/rgthree-comfy custom nodes, and the required dependencies.Launch a container based on the image.
docker run -it --privileged \
--rm \
--device=/dev/kfd \
--device=/dev/dri \
--group-add video \
--cap-add=SYS_PTRACE \
--security-opt seccomp=unconfined \
--ipc=host \
-p 8188:8188 \
comfyui-rocm
Run ComfyUI#
To run ComfyUI, you can choose to launch the server remotely or from the command line.
Launch the remote ComfyUI server#
After starting a Docker container with either option above, you can launch the ComfyUI server:
python $COMFYUI_PATH/main.py --port 8188 --listen
This starts the server on the default port 8188. The port can be changed by setting
the environment variable COMFYUI_PORT_HOST or by using the --port flag.
Server options:
--listen: Allow connections from any network interface (needed for remote or container access).--port <PORT>: Change the default port (default:8188). Can also be set via theCOMFYUI_PORT_HOSTenvironment variable.--gpu-only: Force all operations to run on the GPU.
Launch ComfyUI from the command line#
Start the ComfyUI server from the command line.
python ComfyUI/main.pyThis starts the server and displays a prompt like:
To see the GUI go to: http://127.0.0.1:8188
Navigate to
http://127.0.0.1:8188in your web browser. You might need to replace8188with the appropriate port number.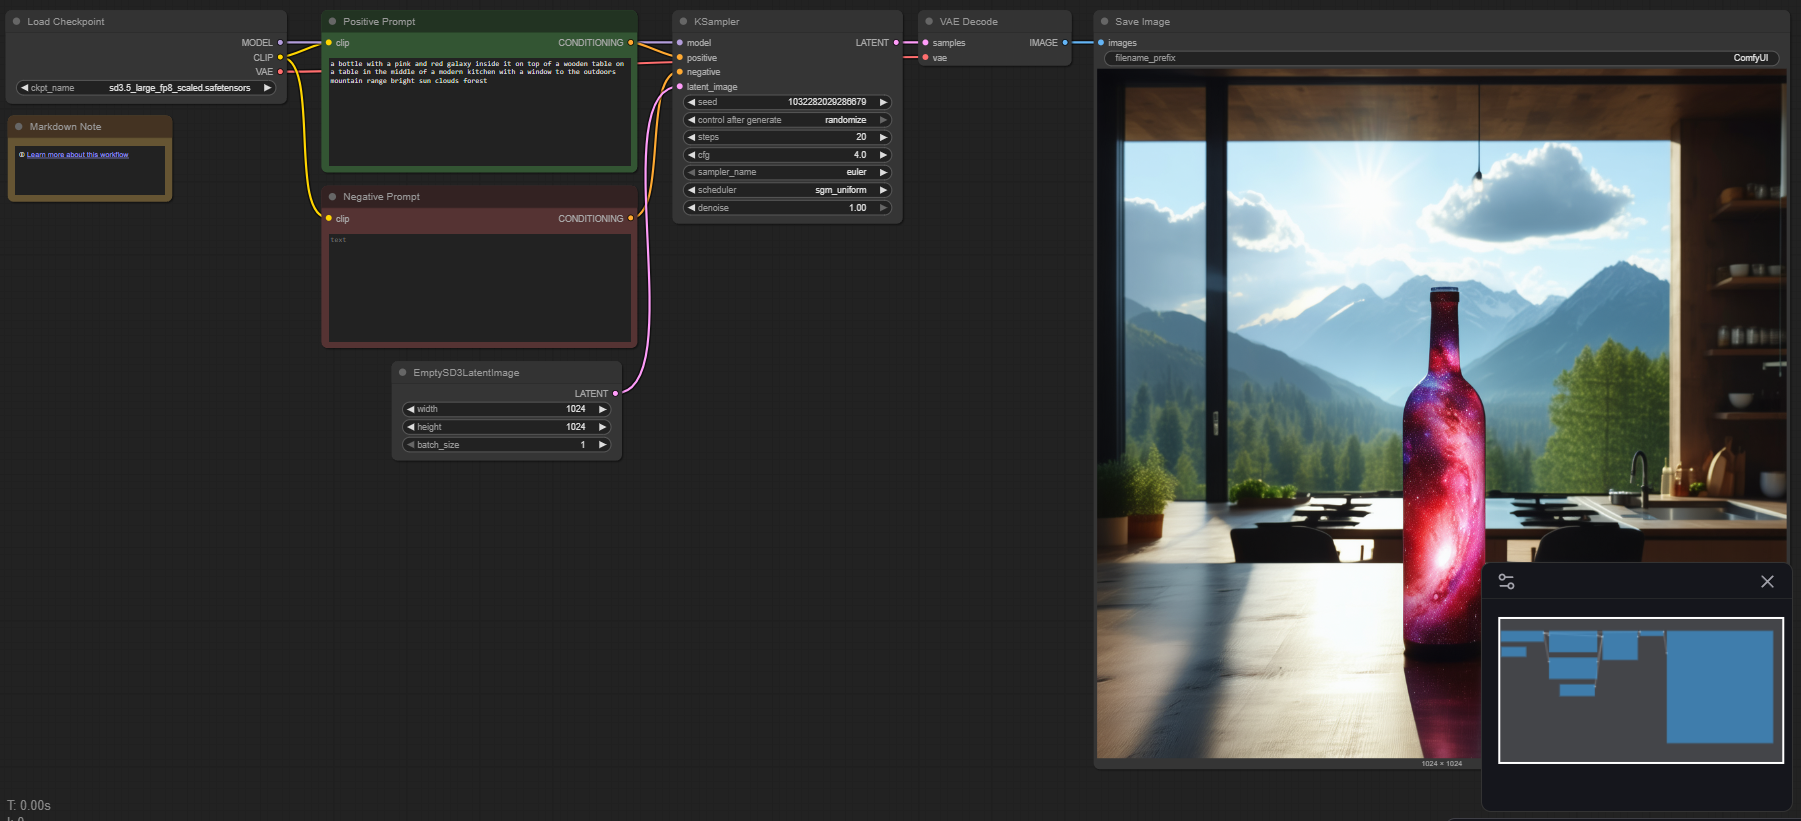
Search for one of the following templates and download any missing models. See Download and use models in ComfyUI.
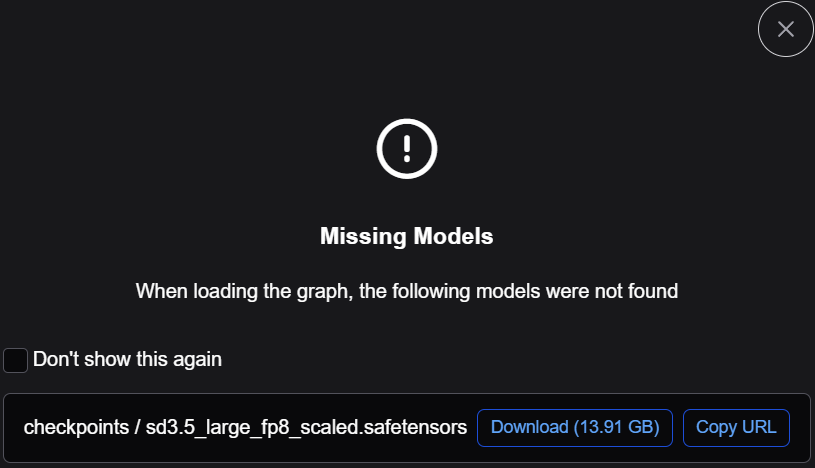
Select Template → Model Filter → SD3.5 → SD3.5 Simple

Download required models, if missing.
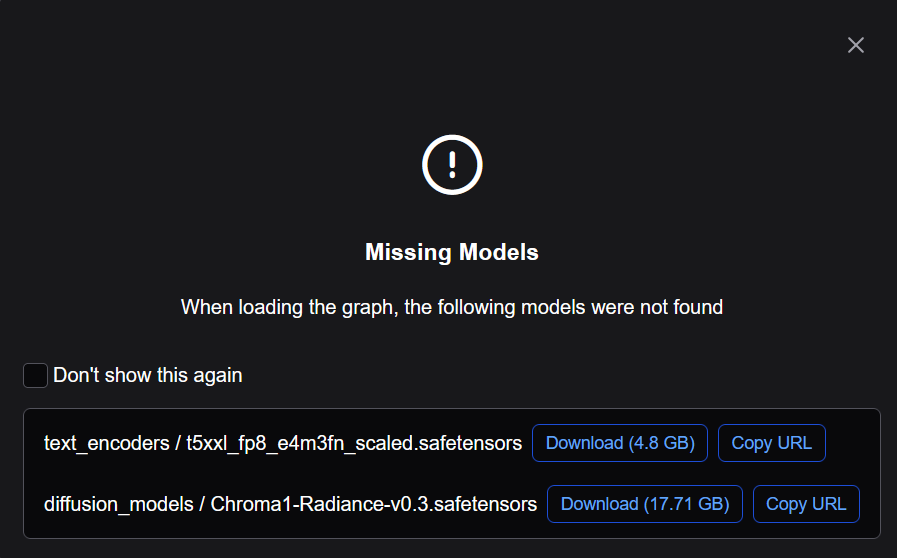
Select Template → Model Filter → Chroma → Chroma1 Radiance text to image

Download required models, if missing.
Click Run.
The application will use your AMD GPU to convert the prompted text to an image.
Test the ComfyUI installation#
To verify that ComfyUI was installed correctly, test ROCm PyTorch support. Inside the running container, confirm that PyTorch detects the GPU:
python3 -c "import torch; print(torch.cuda.is_available()); print(torch.cuda.get_device_name(0))"
The expected output is True followed by your AMD GPU device name, for example:
True
AMD Instinct MI355X
If you see the version string above, ComfyUI 0.18.2 has been installed successfully. You can now use ComfyUI in your projects.
Next Steps#
Now that you have ComfyUI running on your AMD Instinct GPU, you can:
Explore additional workflow templates
Create custom workflows from scratch
Install community-created custom nodes
Experiment with different models and parameters
Build your own custom nodes for specialized tasks