Text-to-video generation with ComfyUI and an AMD Radeon GPU#
With the advancement of Artificial Intelligence Generated Content (AIGC) technology, the fields of text-to-video and image-to-video generation have garnered widespread attention from visual designers, art enthusiasts, and media creators.
ComfyUI is a node-based graphical interface designed for diffusion models, enabling users to visually construct AI image/video generation workflows through modular operations. Its modular node design, efficiency, compatibility, and workflow advantage make it a perfect choice for media creators to boost productivity.
This tutorial guides you through setting up and running ComfyUI on AMD Radeon™ GPUs using ROCm™ software. Learn how to configure your environment, install the ComfyUI tool, and generate video from text on AMD consumer GPUs.
Prerequisites#
This tutorial was developed and tested using the following setup.
Operating system#
Ubuntu 22.04/24.04: Ensure your system is running Ubuntu 22.04 or 24.04.
Hardware#
AMD Radeon GPUs: This tutorial was tested on an AMD Radeon RX 7900 XTX GPU. Ensure you are using an AMD Radeon GPU or compatible hardware with ROCm support and that your system meets the official requirements.
Software#
ROCm 6.3: Install and verify ROCm by following the ROCm install guide. After installation, confirm your setup using:
rocm-smi
This command lists your AMD GPUs with relevant details, similar to the image below:

ComfyUI setup#
To set up the ComfyUI inference environment, follow the steps below.
Prepare the inference environment#
Create and activate a virtual environment using conda or venv.
conda create -n comfyui_env_test python=3.12
conda activate comfyui_env_test
PyTorch installation#
Install the PyTorch ROCm wheels in the virtual environment. See Install PyTorch for Radeon GPUs for installation instructions.
Install and launch Jupyter#
Inside the Python virtual environment, install Jupyter using the following command:
pip install jupyter
Then start the Jupyter server:
jupyter-lab --ip=0.0.0.0 --port=8888 --no-browser --allow-root
Note: Ensure port 8888 is not already in use on your system before running the above command. If it is, you can specify a different port by replacing --port=8888 with another port number, for example, --port=8890.
Verify the PyTorch installation#
Verify that PyTorch is correctly installed.
Step 1: Verify PyTorch is installed and can detect the GPU compute device.
!python3 -c 'import torch' 2> /dev/null && echo 'Success' || echo 'Failure'
The expected result is Success.
Step 2: Confirm the GPU is available.
!python3 -c 'import torch; print(torch.cuda.is_available())'
The expected result is True.
Step 3: Display the installed GPU device name.
!python3 -c "import torch; print(f'device name [0]:', torch.cuda.get_device_name(0))"
The expected result should be similar to: device name [0]: Radeon RX 7900 XTX
device name[0]: <Supported AMD GPU>
ComfyUI installation#
Install ComfyUI from source on the system with the AMD GPU.
Clone the following repo:
!git clone https://github.com/comfyanonymous/ComfyUI.git
Ensure that PyTorch will not be reinstalled with the CUDA version:
%cd ComfyUI
!sed -i.bak -E '/^(torch|torchaudio|torchvision)([<>=~!0-9.]*)?$/s/^/# /' requirements.txt
Install the dependencies:
!pip3 install -r requirements.txt
Running text-to-video generation#
Follow these steps to generate video from your text.
Model preparation#
LTX Video is an efficient video model from Lightricks. Ltx-video-2B-v0.9.5 is used for this tutorial.
Download the LTX Video model ltx-video-2b-v0.9.5.safetensors and text encoder model t5xxl_fp16.safetensors files. Place these model files in the ComfyUI/models/checkpoints and ComfyUI/models/text_encoders folders. Use the following code to automate the process:
import os
import requests

# Define the URLs and destination paths
models = {
    "https://huggingface.co/Lightricks/LTX-Video/resolve/main/ltx-video-2b-v0.9.5.safetensors":
        "models/checkpoints/ltx-video-2b-v0.9.5.safetensors",
    "https://huggingface.co/Comfy-Org/mochi_preview_repackaged/resolve/main/split_files/text_encoders/t5xxl_fp16.safetensors":
        "models/text_encoders/t5xxl_fp16.safetensors"
}

# Create target directories if they don't exist
for path in models.values():
    os.makedirs(os.path.dirname(path), exist_ok=True)

# Download files
for url, path in models.items():
    print(f"Downloading {url} to {path}...")
    response = requests.get(url, stream=True)
    response.raise_for_status()
    with open(path, "wb") as f:
        for chunk in response.iter_content(chunk_size=8192):
            f.write(chunk)
    print(f"✅ Downloaded to {path}")
Different diffusion model pipelines might contain different submodels that should be placed into the proper subfolders under ComfyUI/models.
Launch the server#
Launch the ComfyUI server:
!python3 main.py
After the server launches, the log will show the following entries:
Starting server

To see the GUI go to: http://127.0.0.1:8188
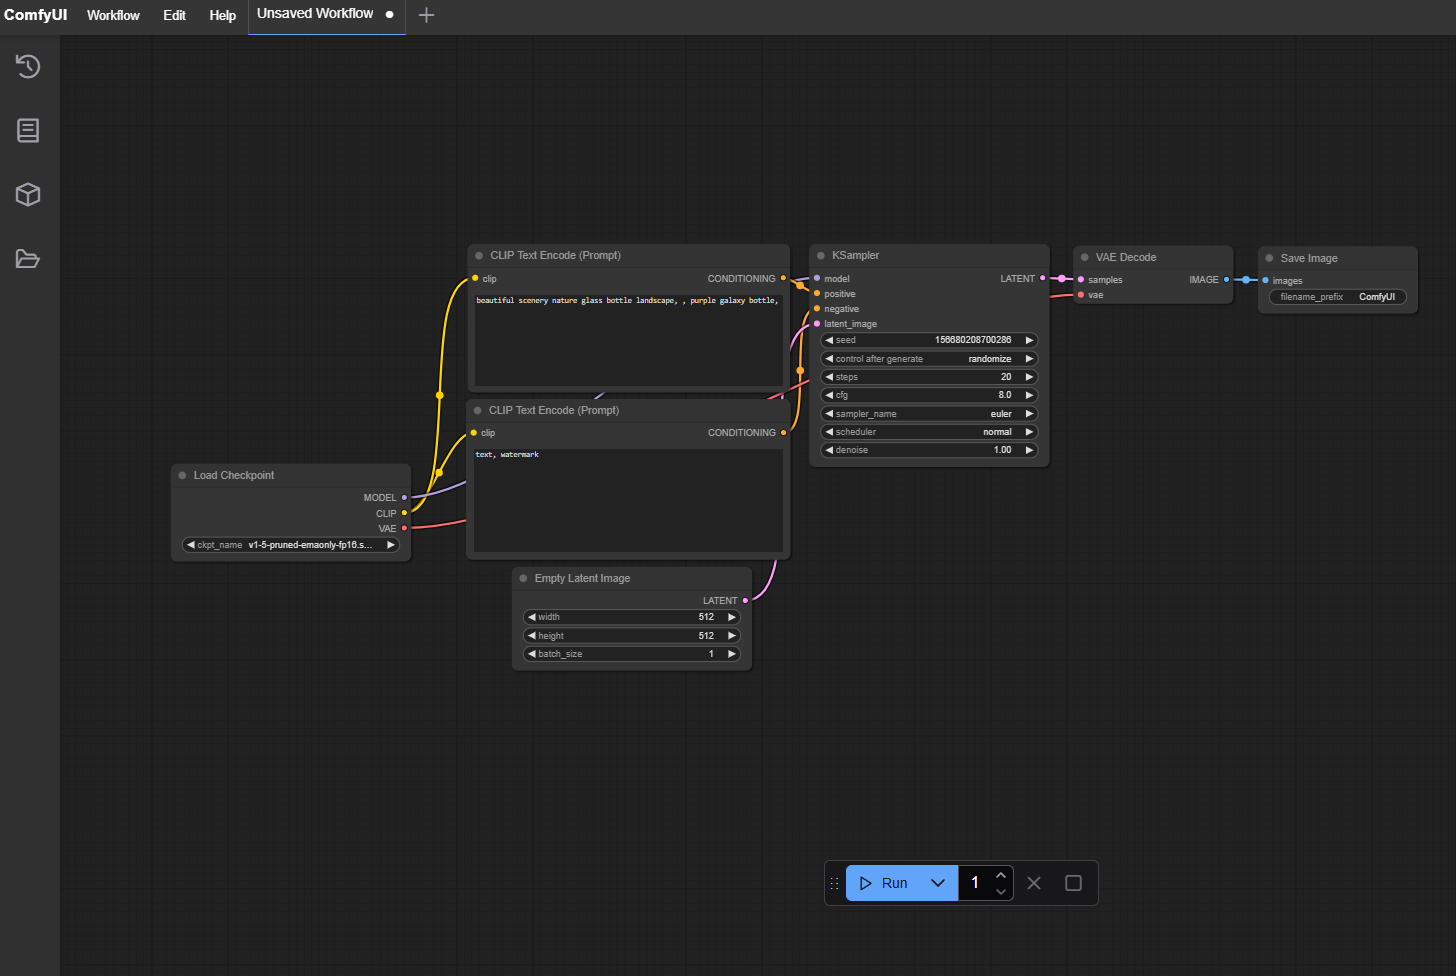
Copy the address http://127.0.0.1:8188 and paste it into your browser. The resulting webpage displays a default workflow which looks like this:
Load the workflow#
The ComfyUI workflow defines the full pipeline and parameters used to generate an image or video. It’s formatted as a JSON file or encoded in a WebP animated image (*.webp). You can construct your own workflow from scratch or customize the workflow from third party.
Download the LTX Video text-to-video workflow (in *.json or *.webp format) from the example page, then load it or drag it on the ComfyUI GUI. The loaded workflow looks like the image below:
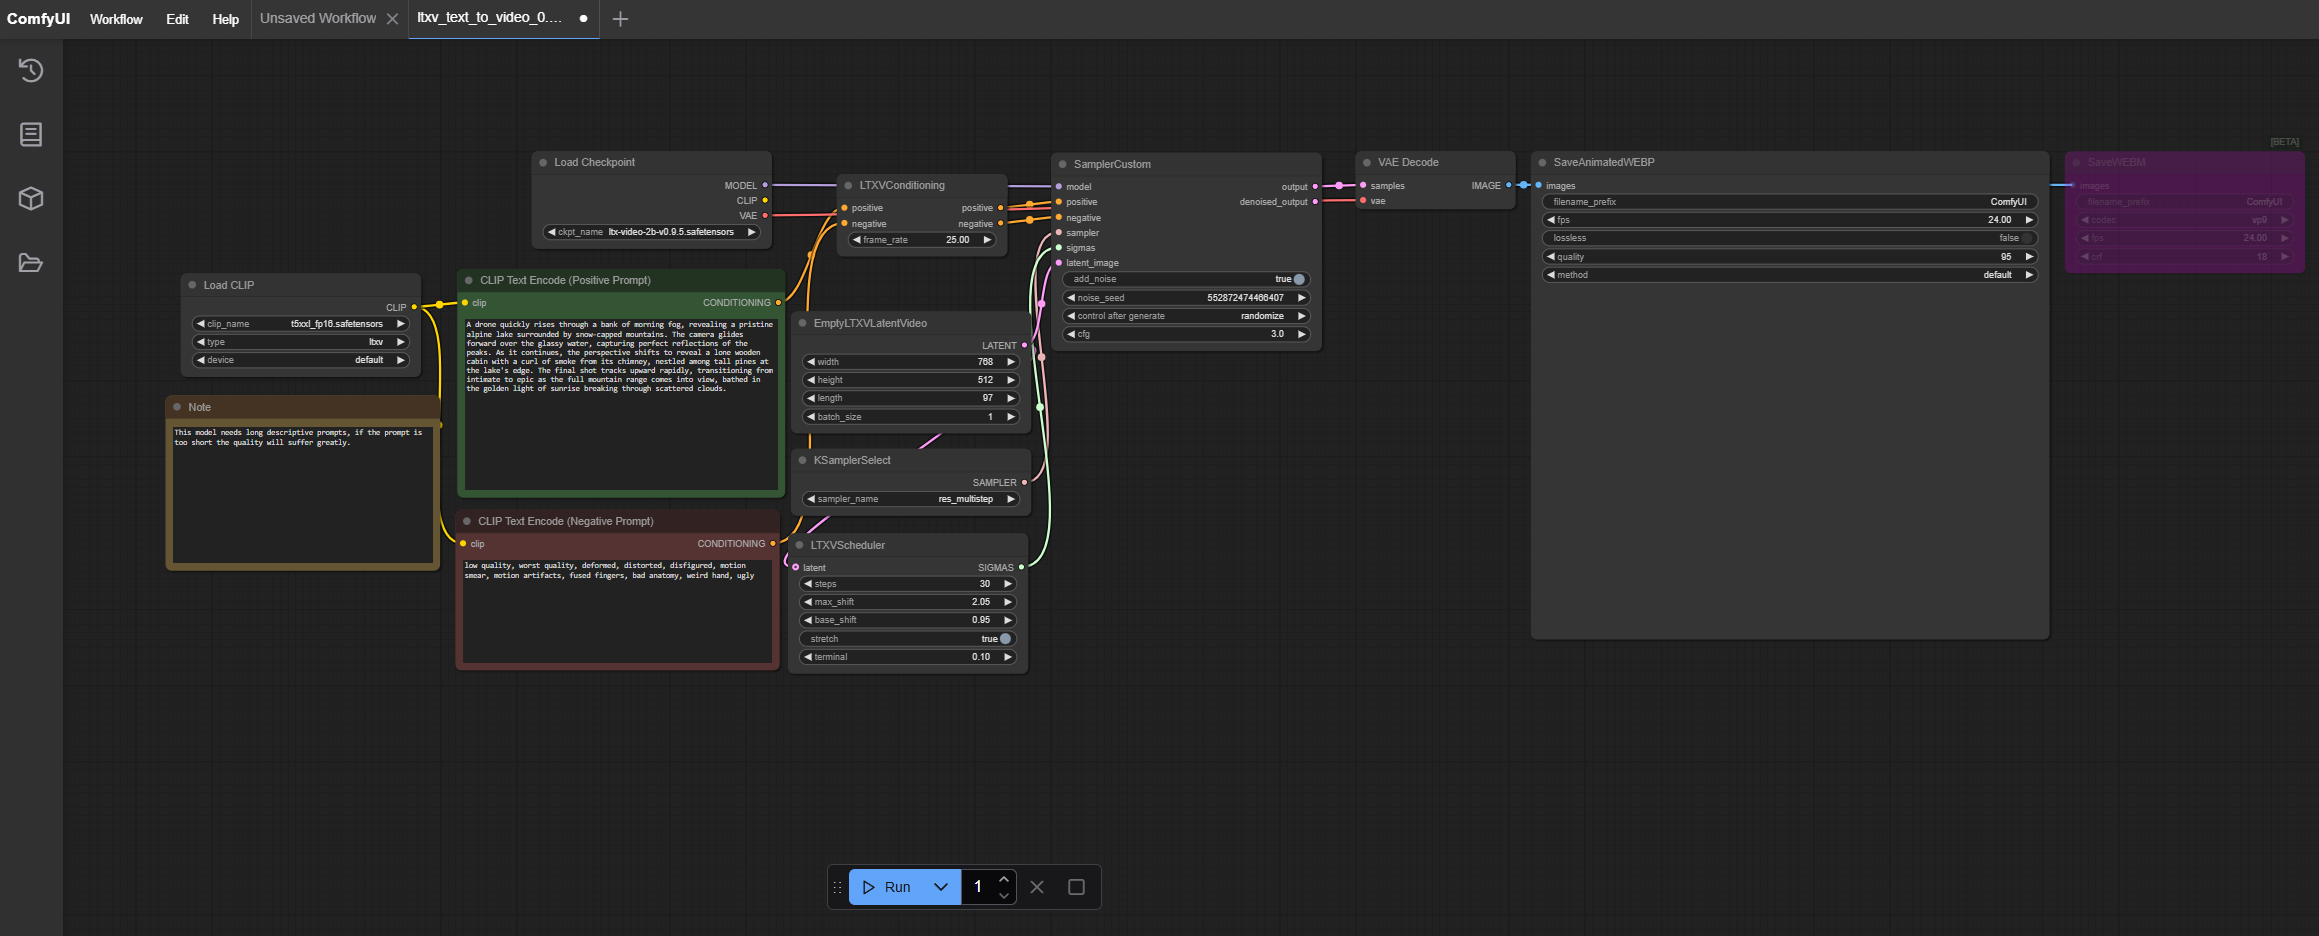
The workflow is composed of different nodes, each of which has different functionality.
The
Load Checkpointnode handles diffusion model loading. Theckpt_namefield can be changed if there are other diffusion models available.The
Load Imagenode handles loading the input image. Upload the required image using this node.The
CLIP TEXT Encode (Positive Prompt)node is a placeholder for the positive prompt. You can change it to your own prompt. Here is the recommended prompt for this tutorial:A drone quickly rises through a bank of morning fog, revealing a pristine alpine lake surrounded by snow-capped mountains. The camera glides forward over the glassy water, capturing perfect reflections of the peaks. As it continues, the perspective shifts to reveal a lone wooden cabin with a curl of smoke from its chimney, nestled among tall pines at the lake’s edge. The final shot tracks upward rapidly, transitioning from intimate to epic as the full mountain range comes into view, bathed in the golden light of sunrise breaking through scattered clouds.
The
EmptyLTXVLatentVideonode is used to control the frame size and length for the generated video.
For more information about the ComfyUI nodes, see the ComfyUI wiki.
Run inference#
After the workflow is ready, click Run to initiate the whole pipeline to process. The output log for the inference will look like this:
 got prompt
 model weight dtype torch.bfloat16, manual cast: None
 model_type FLUX
 VAE load device: cuda:0, offload device: cpu, dtype: torch.float32
 no CLIP/text encoder weights in checkpoint, the text encoder model will not be loaded.
 CLIP/text encoder model load device: cuda:0, offload device: cpu, current: cpu, dtype: torch.float16
 Requested to load MochiTEModel_
 loaded completely 23280.8 9083.38671875 True
 Requested to load LTXV
 loaded completely 10667.71279296875 3667.902587890625 True
 100%|███████████████████████████████████████████████████████████████████████████████████████████████████████████████████████████████████████████████████████████████████████████████████████████████████████████████████████████████████████████████████████████████████████████████████████████████| 30/30 [00:43<00:00,  1.46s/it]
 Requested to load VideoVAE
 loaded completely 5763.6171875 4756.450138092041 True
 Warning: Ran out of memory when regular VAE decoding, retrying with tiled VAE decoding.
 Prompt executed in 66.29 seconds
The final output video is shown in the SaveAnimatedWEBP node, while the *.webp file output can be found in the ComfyUI/output/ folder.