OCR with vision-language models with vLLM#
Author: Mahdi Ghodsi
Knowledge level: Beginner
This notebook provides a step-by-step guide to building an OCR system using vision-language models with vLLM and Gradio for inference.
Optical Character Recognition (OCR) is essential for extracting text from images, scanned documents, and handwritten content. Vision-language models (VLMs) enhance OCR by leveraging transformer-based architectures, enabling context-aware text recognition.
This tutorial explores how to use models like LLaVA, BLIP-2, and Qwen-VL for OCR. It covers the following topics:
Environment setup with Docker and ROCm
Launch Jupyter Notebooks in the container
Installing dependencies
Building an OCR with vLLM
Transforming the OCR to a GUI-enabled system with multiple model choices
The tutorial uses vLLM for large language model (LLM) inference. vLLM optimizes text generation workloads by effectively batching requests and utilizing GPU resources, offering high throughput and low latency, which is perfect for chatbots.
 #
#
Prerequisites#
This tutorial was developed and tested using the following setup.
Operating system#
Ubuntu 22.04: Ensure your system is running Ubuntu version 22.04.
Hardware#
AMD Instinct™ GPUs: This tutorial was tested on an AMD Instinct MI300X GPU. Ensure you are using an AMD Instinct GPU or compatible hardware with ROCm support and that your system meets the official requirements.
Software#
ROCm 6.2 or 6.3: Install and verify ROCm by following the ROCm install guide. After installation, confirm your setup using:
amd-smi
This command lists your AMD GPUs with relevant details.
Note: For ROCm 6.4 and earlier, use the
rocm-smicommand instead.Docker: Ensure Docker is installed and configured correctly. Follow the Docker installation guide for your operating system.
Note: Ensure the Docker permissions are correctly configured. To configure permissions to allow non-root access, run the following commands:
sudo usermod -aG docker $USER
newgrp docker
Verify Docker is working correctly with:
docker run hello-world
Hugging Face API access#
Obtain an API token from Hugging Face for downloading models.
Ensure the Hugging Face API token has the necessary permissions and approval to access the Meta Llama checkpoints.
1. Environment setup with Docker and ROCm#
Launch the Docker container. From your host machine, run this command:
docker run -it --rm \
  --network=host \
  --device=/dev/kfd \
  --device=/dev/dri \
  --group-add=video \
  --ipc=host \
  --cap-add=SYS_PTRACE \
  --security-opt seccomp=unconfined \
  --shm-size 8G \
  --hostname=ROCm-FT \
  --env HUGGINGFACE_HUB_CACHE=/workspace \
  -v $(pwd):/workspace \
  -w /workspace/notebooks \
  --entrypoint /bin/bash \
  rocm/vllm-dev:main
Note: This command mounts the current directory to the /workspace directory in the container. Ensure the notebook file is either copied to this directory before running the Docker command or uploaded into the Jupyter Notebook environment after it starts. Save the token or URL provided in the terminal output to access the notebook from your web browser. You can download this notebook from the AI Developer Hub GitHub repository.
2. Launch Jupyter Notebooks in the container#
Inside the Docker container, install Jupyter using the following command:
pip install jupyter
Start the Jupyter server:
jupyter-lab --ip=0.0.0.0 --port=8888 --no-browser --allow-root
Note: Ensure port 8888 is not already in use on your system before running the above command. If it is, you can specify a different port by replacing --port=8888 with another port number, for example, --port=8890.
3. Installing dependencies#
Install the libraries needed for this tutorial. Run the following commands inside the Jupyter notebook running within the Docker container:
!pip install gradio requests
Provide your Hugging Face token#
You’ll require a Hugging Face API token to access Llama-3.1-8B. Generate your token at Hugging Face Tokens and request access for Llama-3.2-11B-Vision-Instruct. Tokens typically start with “hf_”.
Run the following interactive block in your Jupyter notebook to set up the token:
from huggingface_hub import notebook_login, HfApi

# Prompt the user to log in
notebook_login()
Verify that your token was accepted correctly:
# Validate the token
try:
    api = HfApi()
    user_info = api.whoami()
    print(f"Token validated successfully! Logged in as: {user_info['name']}")
except Exception as e:
    print(f"Token validation failed. Error: {e}")
4. Building an OCR with vLLM#
First, define the ImageInference inference class. This class provides a constructor to initialize a model for inference. Additionally, it defines another function that runs inference on an image that you provide.
from vllm import LLM, SamplingParams
from transformers import AutoTokenizer
from PIL import Image
from vllm.multimodal.utils import fetch_image
import sys

current_model = "meta-llama/Llama-3.2-11B-Vision-Instruct"

class ImageInference:
    def __init__(self, model_name=current_model):
        # Initialize the model and tokenizer
        self.llm = LLM(model=model_name, max_model_len=4096, max_num_seqs=16, enforce_eager=True)
        self.tokenizer = AutoTokenizer.from_pretrained(model_name)

    def generate_image_output(self, image: Image) -> str:
        # Prepare the prompt and the image for the model
        messages_og = [{'role': 'user', 'content': "<|image|> What is in this image?"}]
        messages = [{
            'role': 'user',
            'content': (
                "Act as an OCR assistant. Analyze the provided <|image|> image and:\n"
                "1. Identify and transcribe all visible text in the image exactly as it appears.\n"
                "2. Preserve the original line breaks, spacing, and formatting from the image.\n"
                "3. Output only the transcribed text, line by line, without adding any commentary or explanations or special characters.\n"
            )
        }]
        prompt = self.tokenizer.apply_chat_template(messages, tokenize=False, add_generation_prompt=True)

        sampling_params = SamplingParams(max_tokens=512, temperature=0.7)

        # Generate output from the model
        outputs = self.llm.generate({
            "prompt": prompt,
            "multi_modal_data": {"image": image},
        }, sampling_params=sampling_params)

        # Extract and return generated text
        generated_text = outputs[0].outputs[0].text if outputs else "No output generated."
        return generated_text
Testing the OCR system#
Download this test image by running the following command:
import requests

url = "https://raw.githubusercontent.com/ROCm/gpuaidev/main/docs/notebooks/assets/together_we_advance_.png"
filename = "together_we_advance_.png"

response = requests.get(url)
with open(filename, "wb") as file:
    file.write(response.content)

print("Download complete:", filename)
Now it’s time to test your OCR system. First read the image, then view it.
pil_image = Image.open("together_we_advance_.png")
pil_image = pil_image.convert("RGB")  # Ensure the image is in RGB format
pil_image
Next, initialize an instance of the ImageInference class.
# Initialize the inference class
inference = ImageInference()
Now pass the image to the model for inference and print the results.
# Generate output for the image
output = inference.generate_image_output(pil_image)

# Print the result
print("Model Output:")
print(output)
Congratulations. You’ve just built an OCR system. That’s how simple it is to create an OCR-like system that transcribes the text in a given image.
5. Transforming the OCR to a GUI-enabled system with multiple model choices#
To provide a graphical interface for your chatbot, use Gradio to create an interactive web-based UI.
Import Gradio and define a list of VLM models to access#
You’re going to create a shortlist of handpicked models that can analyze images. The full list is available here.
import gradio as gr

# Define available models and their Hugging Face model IDs
MODEL_OPTIONS = {
    "Llama-3.2-11B-Vision-Instruct": "meta-llama/Llama-3.2-11B-Vision-Instruct",
    "BLIP-2 (2.7B)": "Salesforce/blip2-opt-2.7b",
    "BLIP-2 (6.7B)": "Salesforce/blip2-opt-6.7b",
    "Fuyu (8B)": "adept/fuyu-8b",
    "GLM-4V (9B)": "THUDM/glm-4v-9b",
    "H2OVL Mississippi (2B)": "h2oai/h2ovl-mississippi-2b",
    "H2OVL Mississippi (800M)": "h2oai/h2ovl-mississippi-800m",
    "InternVL2 (4B)": "OpenGVLab/InternVL2-4B",
    "InternVL2 (2B)": "OpenGVLab/Mono-InternVL-2B",
    "LLaVA 1.5 (7B)": "llava-hf/llava-1.5-7b-hf",
    "LLaVA 1.5 (13B)": "llava-hf/llava-1.5-13b-hf",
    "MiniCPM-V (2_5)": "openbmb/MiniCPM-Llama3-V-2_5",
    "MiniCPM-V (2)": "openbmb/MiniCPM-V-2",
    "Molmo (7B)": "allenai/Molmo-7B-D-0924",
    "PaliGemma (3B PT)": "google/paligemma-3b-pt-224",
    "PaliGemma (3B Mix)": "google/paligemma-3b-mix-224",
    "Phi-3 Vision (128K)": "microsoft/Phi-3-vision-128k-instruct",
    "Phi-3.5 Vision": "microsoft/Phi-3.5-vision-instruct",
    "Pixtral (12B)": "mistralai/Pixtral-12B-2409",
    "Qwen-VL": "Qwen/Qwen-VL",
    "Qwen-VL-Chat": "Qwen/Qwen-VL-Chat",
    "Qwen2-VL (2B)": "Qwen/Qwen2-VL-2B-Instruct",
    "Qwen2-VL (7B)": "Qwen/Qwen2-VL-7B-Instruct",
}
Create the Gradio interface#
Next, define two simple helper functions for switching models and running inference using your previously defined class, followed by Gradio blocks:
def switch_model(model_name):
global inference
try:
inference = ImageInference(model_name=model_name)
return f"Switched to model: {model_name}"
except Exception as e:
return f"Failed to switch model: {str(e)}"
def analyze_image(image):
try:
pil_image = image.convert("RGB")
result = inference.generate_image_output(pil_image)
return result
except Exception as e:
return f"Error processing the image: {str(e)}"
with gr.Blocks() as interface:
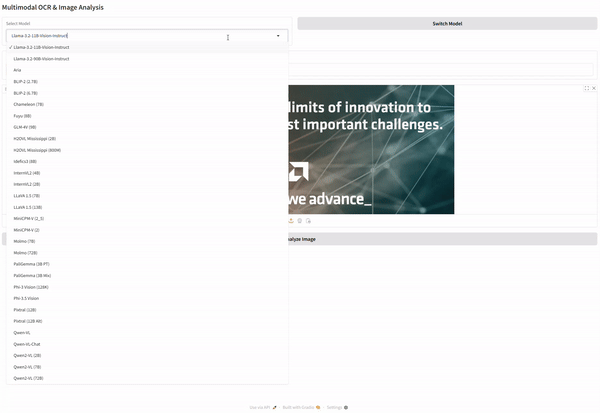
gr.Markdown("## Multimodal OCR & Image Analysis")
with gr.Row():
model_dropdown = gr.Dropdown(
choices=list(MODEL_OPTIONS.keys()),
value="Llama-3.2-11B-Vision-Instruct",
label="Select Model",
)
switch_button = gr.Button("Switch Model")
model_status = gr.Textbox(value=f"Current Model: {current_model}", label="Model Status")
image_input = gr.Image(type="pil", label="Upload Image")
analyze_button = gr.Button("Analyze Image")
# output_box = gr.Textbox(label="Model Output", lines=10)
output_box = gr.Markdown(label="Model Output")
switch_button.click(
fn=lambda selected_model: (switch_model(MODEL_OPTIONS[selected_model]), f"Current Model: {MODEL_OPTIONS[selected_model]}"),
inputs=[model_dropdown],
outputs=[model_status, model_status],
)
analyze_button.click(fn=analyze_image, inputs=image_input, outputs=output_box)
Run the Gradio application#
Execute the code block below to launch the GUI. The interface displays in your browser, letting you interact with the OCR system.
interface.launch()
Conclusion#
In this tutorial, you accomplished the following tasks:
Configured a Docker environment with ROCm 6.2 or 6.3 and vLLM.
Built an OCR class using vLLM.
Extended the functionality by adding a GUI and a selection of multiple different models.